Mira Connect Software and Key Digital keypads can be used together to add low-cost, small-form-factor, and easy-to-configure user interfaces for any audio-visual (AV) application.
Mira Portal, the configuration and management platform for Mira Connect AV control , can automatically generate a configuration file for Key Digital KD-WP8 keypads for controlling an AV system with Mira Connect Software. You can add multiple keypads in a room, and they can be set up with different controls.
No programming is required to configure either Mira Connect Software or the keypad. Users assign Mira Connect Software room control commands to the keypad’s buttons and then export a keypad configuration file. The configuration file uses Mira Connect’s room control API to control the room so users don’t need to know the API syntax of any of the equipment they’d like to control. There is no programming and no debugging required to configure the keypad.

Keypads can complement an existing system’s user interface by adding a user interface where it is needed or, depending upon the application, can replace much of the functionality of a touchscreen at a lower price point. Key Digital keypads include multiple sets of informative button labels and clear plastic key caps that secure the labels to the buttons. Users can add the labels and key caps once they have configured the buttons.
Designed for K-12, corporate, higher education, house of worship, and other applications, a keypad with Mira Connect Software makes it easy for users to power on displays, select video sources, adjust volume, mute microphones, launch calls, and more.
Set Up Mira Connect Software to Control the Equipment in the Room
Once you have downloaded and installed Mira Connect Software onto a Windows PC in the room, you are ready to configure the software by selecting the equipment to control within Mira Portal.
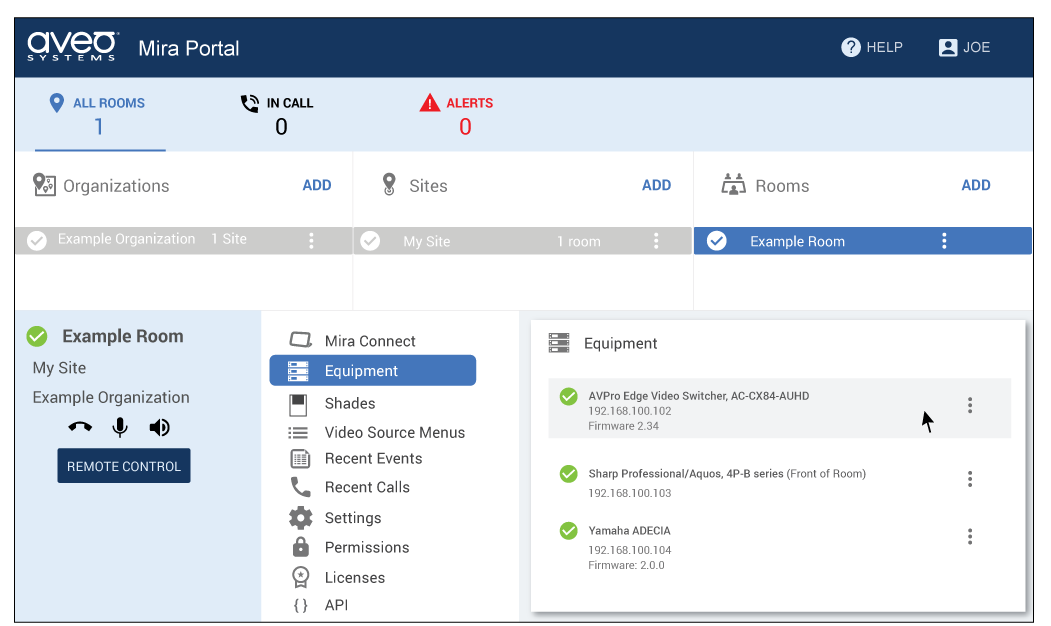
The following figure shows a room in Mira Portal configured with a Yamaha ADECIA DSP, a Sharp display, and an AVPro video switcher. See our training videos for more information about adding and configuring equipment with Mira Portal.
Set Up Mira Portal to Generate a Key Digital Keypad Configuration File
Once the equipment has been configured in Mira Portal, you can assign the desired room commands to keypad buttons. For each button, select a room control command from the list. Select any options required for the command, such as the name of the display and the particular display source, as shown in the following figure.
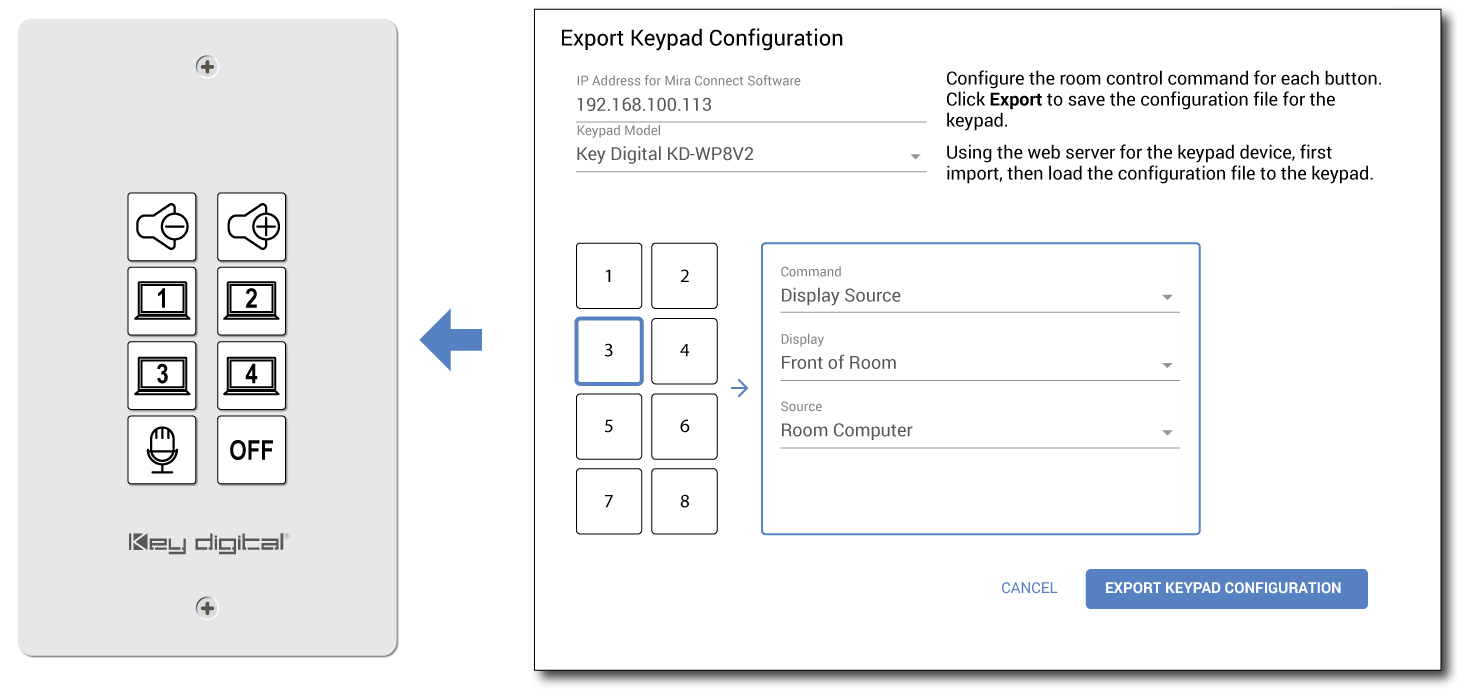
Once room control commands have been assigned to the buttons, click EXPORT KEYPAD CONFIGURATION to create the Key Digital keypad configuration file. The file is saved on your local PC.
You can import the file to the keypad by browsing into the keypad. Once imported and loaded, you can start controlling your room from the keypad.
How Mira Connect works with Key Digital Keypads
The keypad file configures the Key Digital buttons and events with Mira Connect room control commands. Button presses send Mira Connect room control commands to the computer where Mira Connect Software is running. More than one keypad can be configured and communicate with the same PC running Mira Connect Software.
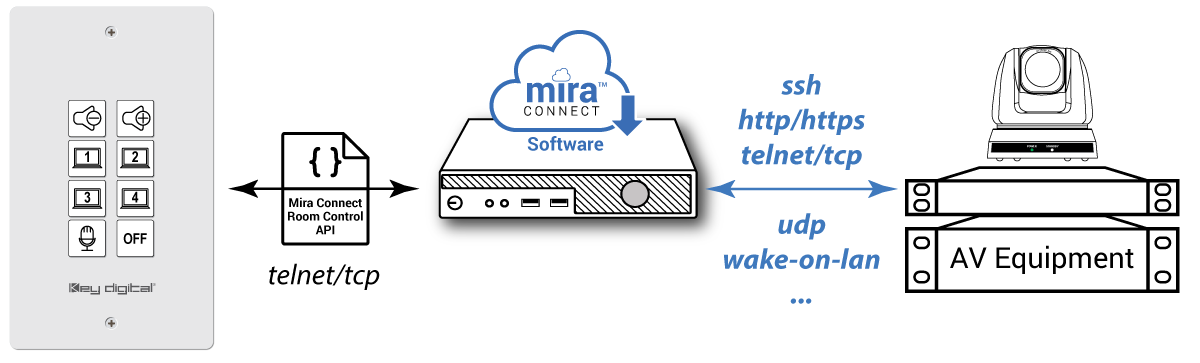
Mira Connect’s room control commands extend the built-in TCP/UDP functionality of the Key Digital keypad to also control equipment over SSH, HTTP, TCP/UDP, and send Wake-on-LAN packets to power on equipment as shown in the following figure. Any equipment supported by Mira Connect Software can be controlled by a Key Digital keypad.
The Key Digital keypad’s web interface can be used to edit buttons and events if you’d like to further customize the keypad’s configuration for your application.
Mira Portal Defines How Keypad Buttons Behave
Mira Portal not only configures the keypad’s buttons with the desired room control commands, it also automatically customizes how the buttons behave to create an intuitive user experience.
For example:
- When using the room power off command, by default the button must be pressed for two seconds before the room is powered off. After the room is powered off, all the keypad LEDs will be turned off.
- When adding support for selecting video sources across several buttons for the same display, the button actions are customized to illuminate blue only for the selected source. As a new source is selected, the previous selected source button’s LED is turned off so only one source selection button is illuminated at a time.
- When adding room mute, sound reinforcement mute, or overflow room mute toggles, the first button press will send a mute command, while the second button press will send an unmute command. The button LED will illuminate red when the mute command is sent and will not be illuminated when the unmute command is sent.
- Users can tap or press-and-hold buttons for repeating volume up and down operations.
These custom behaviors can always be changed by modifying the keypad configuration through the Key Digital keypad’s web user interface.
Mira Connect’s User Interface in a Browser
The built-in user interface for Mira Connect Software is also available in a browser using the REMOTE CONTROL feature. Accessing the system through a browser makes it easy for AV/IT help desk teams to assist users and remotely control the AV equipment in the room.

Summary
Regardless of whether there is an existing touch panel in the room, there are many applications where keypad control interfaces make it easier for users to control their system. Mira Portal supports automatically generating and exporting a configuration file for Key Digital’s KD-WP8-2 and KE-WP8-3 keypads. Once you have created the configuration file, it can be easily uploaded into the Key Digital keypad through its web interface.
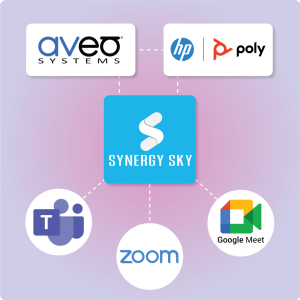
Mira Connect is Aveo Systems’ easy-to-configure and easy-to-use AV control system. When using a Mira Connect Software running on a low-cost PC, the user interface is available in a browser and is automatically generated based on the equipment you’re controlling and the customizations you’ve selected.
Mira Connect Software is the only control system that provides an application programming interface (API) and the ability to discover the room’s capabilities. These features empower users to embed Mira Connect room controls into other third-party user interfaces, including Key Digital and other programmable keypads, any Zoom Rooms controller, Stream Deck controllers, legacy control systems, or any custom application.
Want to learn more?
Contact us if you have an application for Mira Connect and would like to get more information.
For more detailed steps for how to configure a Key Digital keypad with Mira Connect Software, see our Key Digital KD-WP8 Integration how to article.
To learn how to use the Mira Connect Room Control API, see our detailed Room Control API Guide.