
![]() Mira Connect’s directory integration makes it easy to import a comma-separated-value (CSV) file from common contact applications such as Gmail and Outlook. Alternatively, contact names, video and/or telephone numbers, and optional bridge numbers, passcodes, and user extensions can also be manually added to a CSV file.
Mira Connect’s directory integration makes it easy to import a comma-separated-value (CSV) file from common contact applications such as Gmail and Outlook. Alternatively, contact names, video and/or telephone numbers, and optional bridge numbers, passcodes, and user extensions can also be manually added to a CSV file.
This article describes the supported CSV file formats for importing contact directories into Mira Portal.
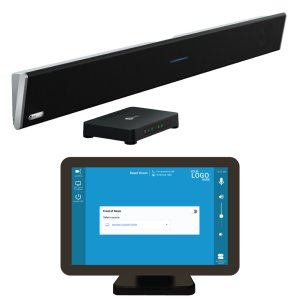
Once imported and assigned to a room using Mira Portal, Mira Connect presents an elegant directory of contacts, making it easy to dial meeting participants.

To get started, you need a CSV file with contact information that will be imported into Mira Portal. Create your own file using this information or follow the instructions at the end of this document for exporting a CSV file from common contact directory programs.
To learn more about importing CSV files into Mira Portal, see our directory guide.
CSV Header Fields
The first row of data in the CSV file must be column header fields that represent the data in their columns.
Gmail exports contacts using column headers such as Given Name, Family Name, Phone Type, and Phone Value columns as well as many other columns that are not used by Mira Portal for creating the directory.

You can download this contacts file as an example.
If manually creating a data file or importing from a different source, you may have different names for the headers and, instead of phone type and value columns, you may have labeled the column with type of number, such as Mobile Phone and Work Phone as shown below.

You can download this other contacts file as an example.
While these examples use specific column header names, you can use any header column names you’d like because, during import to Mira Portal, you can select the type of data in each column and customize the label of the type of contact number.
If you use header column names listed below, the type of data will be automatically detected by Mira Portal, making it simpler to import the data:
- Given Name or First Name for a contact’s first name
- Family Name or Last Name for a contact’s last name
- Two columns for each phone number with one column of Phone 1 – Type and one column for Phone 1 – Value header fields. A second phone number would use Phone 2 – Type and Phone 2 – Value, all the way to up to 9 phone number types and values
- Alternatively, you can use a single column per phone number with Mobile Phone or Work Phone or other ‘PhoneType’ Phone values for different phone numbers where ‘PhoneType’ could be any value such as Work, Cell, Home, …
- Video for a video conferencing number
- Image or Picture for a URL to a contact’s personal picture – the URL can resolve to a local server or to a server outside of the organization. If using pictures on the internet, Mira Connect will need WAN access to use the images.
Optionally, you can also add Department and Organization column headers if you have information about a contact’s department and company or organization name.
Phone Number Formats
Phone numbers can be entered in common formats to make the numbers more readable for users. Examples include, but are not limited to: (123) 456-7890, 123 456 7890, 456-7890, and +(123) 456-7890.
Note that bridge numbers, passcodes, or user extensions are typically separated from phone numbers with commas. When exporting such numbers to a CSV file from Microsoft Excel or a contact manager, the export function will automatically generate a correct CSV file. However, if you are manually editing a CSV file in a text editor, phone numbers that contain commas must be within double quotation marks: ”1 (800) 832-3456,12345,5455”.
If you don’t have video conferencing equipment in your system, you don’t need to add video conferencing numbers.
Using Dropbox Image URLs
If the pictures for your contacts are stored on Dropbox, Dropbox provides a link like this: https://www.dropbox.com/s/nyz13isyx5hxy53/bingo-snoot-01.jpg?dl=0 but you need to change that last “0” to a “1” so Mira Connect can download the image.
The resulting URL should look like this https://www.dropbox.com/s/nyz13isyx5hxy53/bingo-snoot-01.jpg?dl=1 in the contact directory CSV file.
Importing CSV Files into Mira Portal
To learn more about importing CSV files into Mira Portal, see our directory guide or see the directory section in the Mira Connect Administrators Guide.
Exporting CSV from Applications
How to Export a CSV file from Gmail
If you use Gmail, you can export your Gmail contacts and directly import them into Mira Portal. Within Gmail, select Contacts and click Export. Next, select Google CSV on the dialog for type of export, and click Export.

Exporting from Gmail creates a CSV file named contacts.csv with a first row that includes column header labels, followed by rows of data, one row for each contact.
How to Export a CSV file from Outlook.com
Select People at the lower left corner of the page to go to the People page.
On the toolbar, select Manage > Export contacts, and then select Manage and then Export contacts. Choose to export all contacts or only contacts from a specific folder, and then select Export.

At the bottom of the page, select Save to save contacts.csv in your default Downloads folder. Or, select the arrow next to Save and select Save as.
For information on how to export your contacts from Outlook 365, follow these instructions.


