 In this post we’ll explore the Mira Portal settings used to create the Mira Connect user interface in the example room tutorial that was introduced in a previous post.
Mira Connect is a touchscreen control system that provides a simple, intuitive interface that can be easily customized for different applications and user preferences. Mira Portal is the cloud-based management platform for Mira Connect.
Let’s Get Started
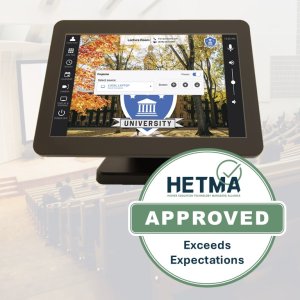
In the center of the following figure, we see the Mira Connect user interface automatically created by the example room tutorial.
[Click here for a full size figure]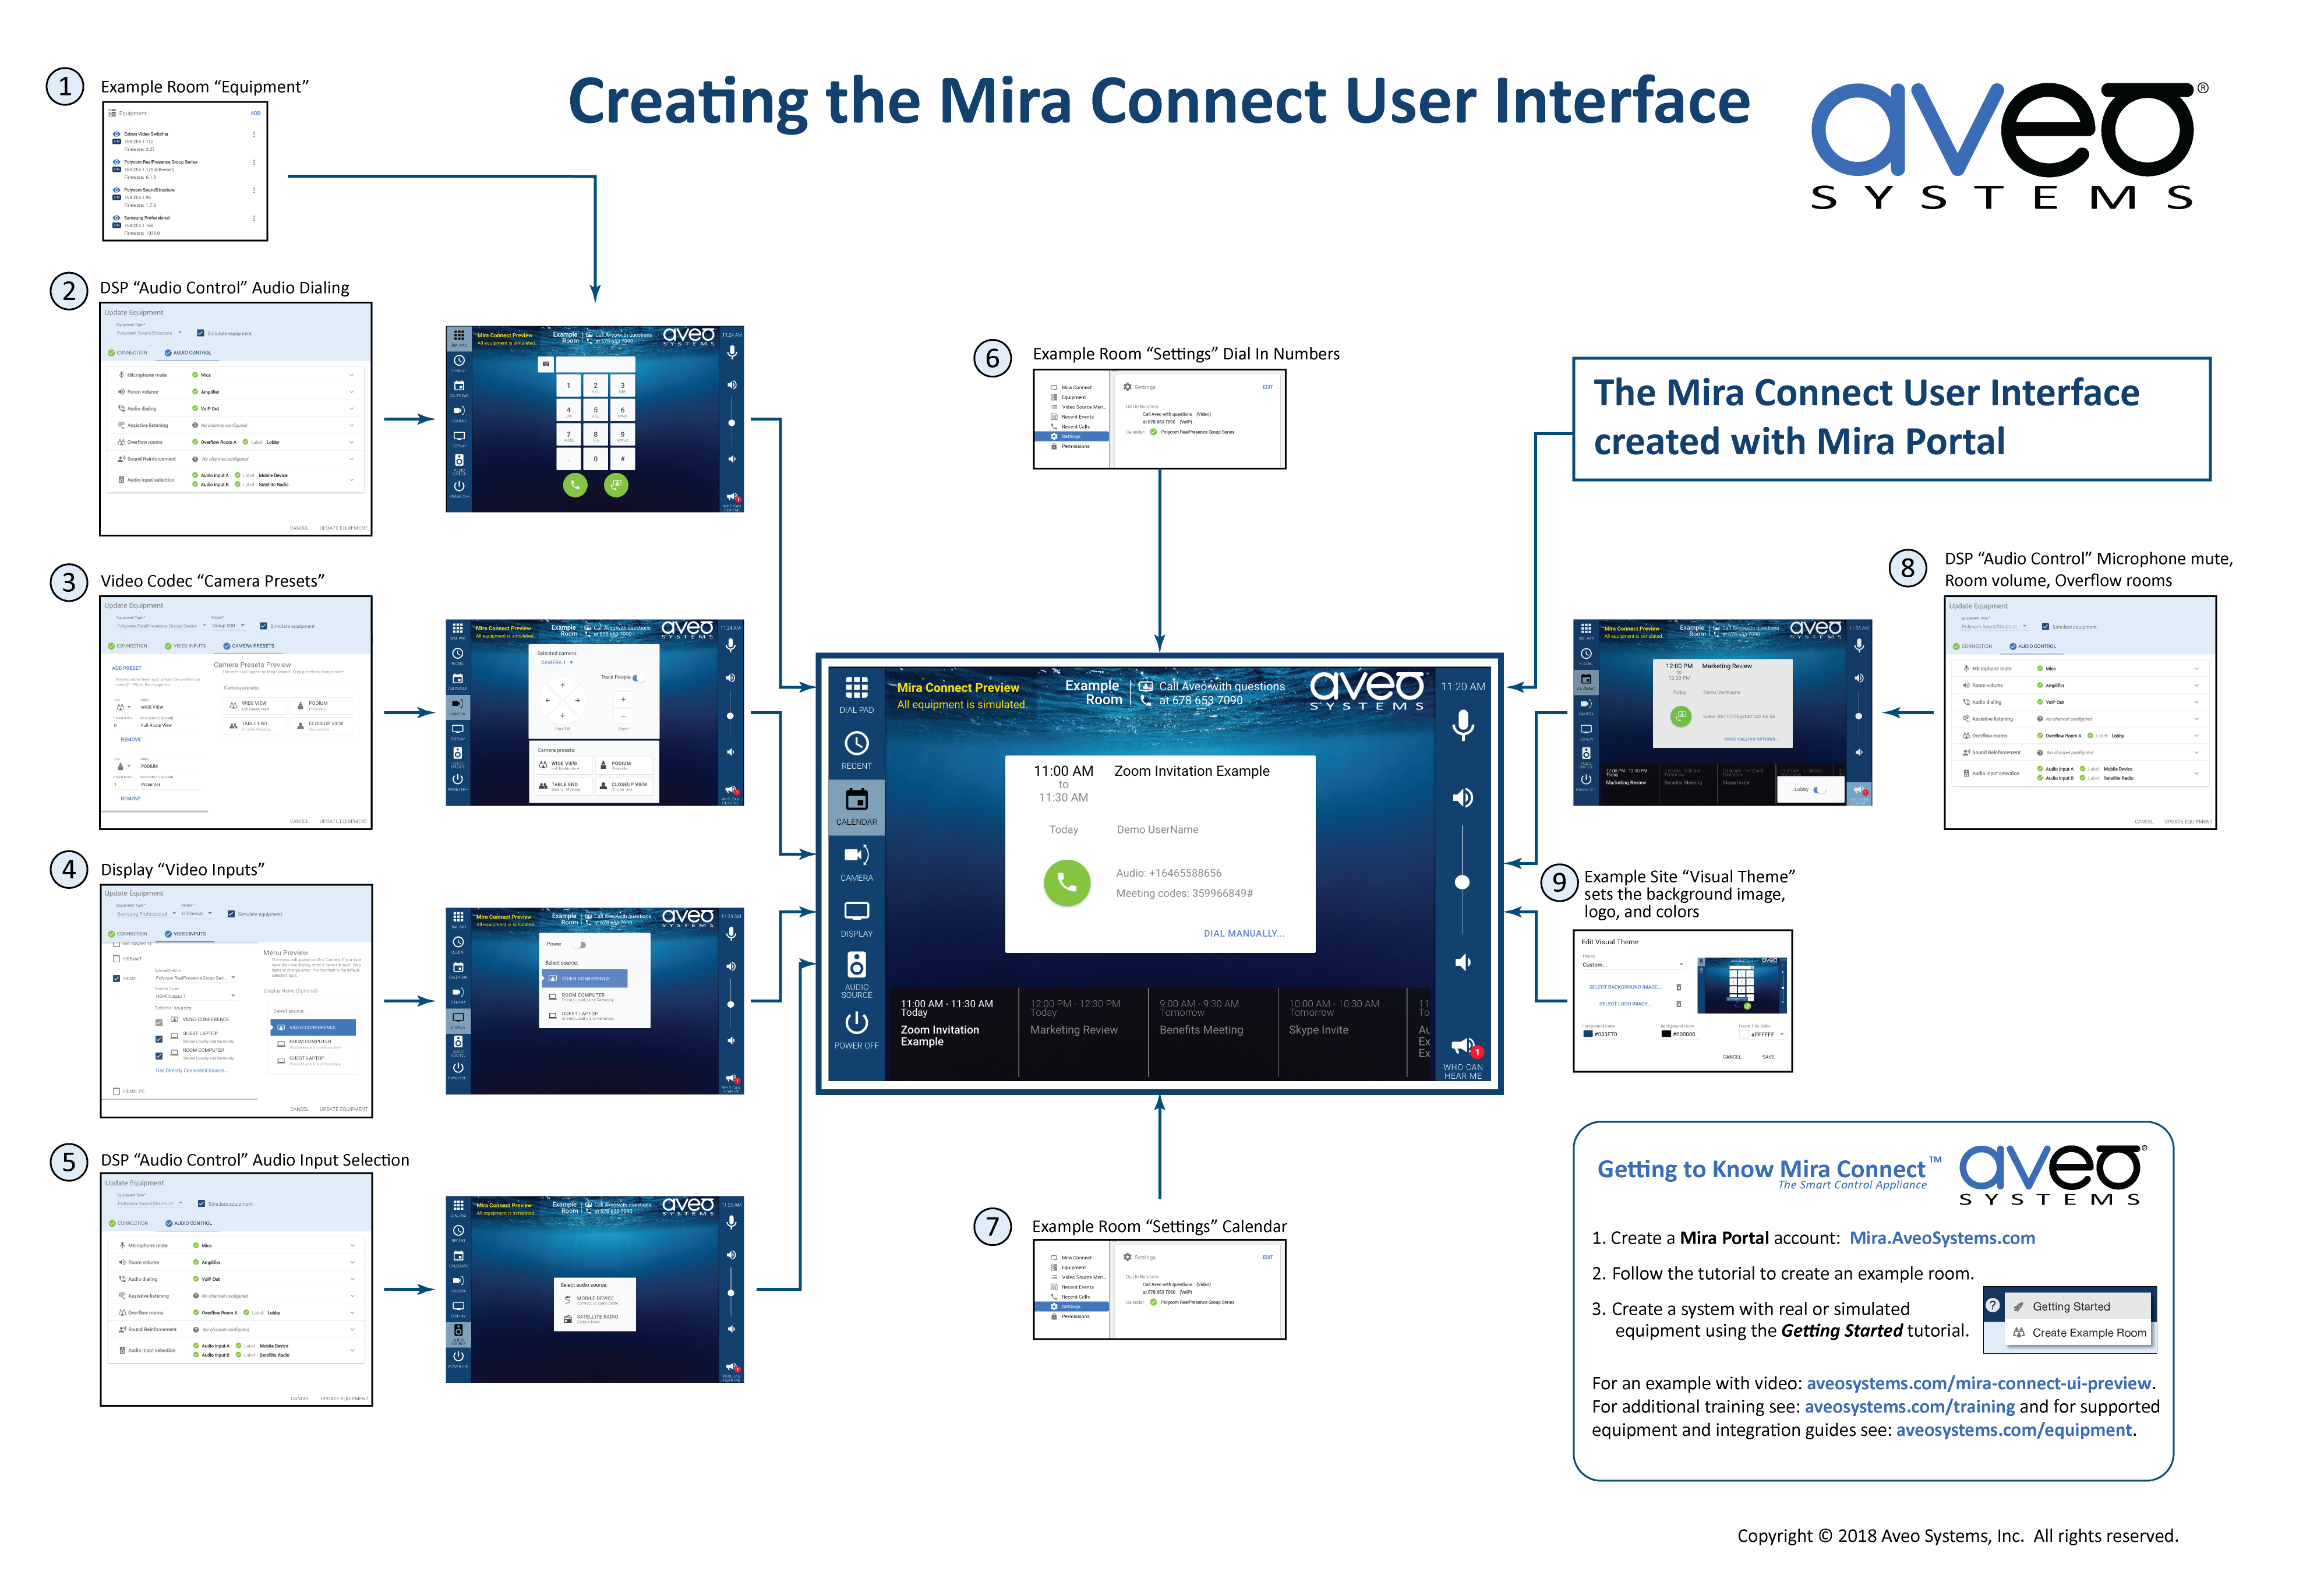
This user interface was driven by the equipment (see highlight 1) that was added to the room and by the options and features enabled for each piece of equipment, as described below.
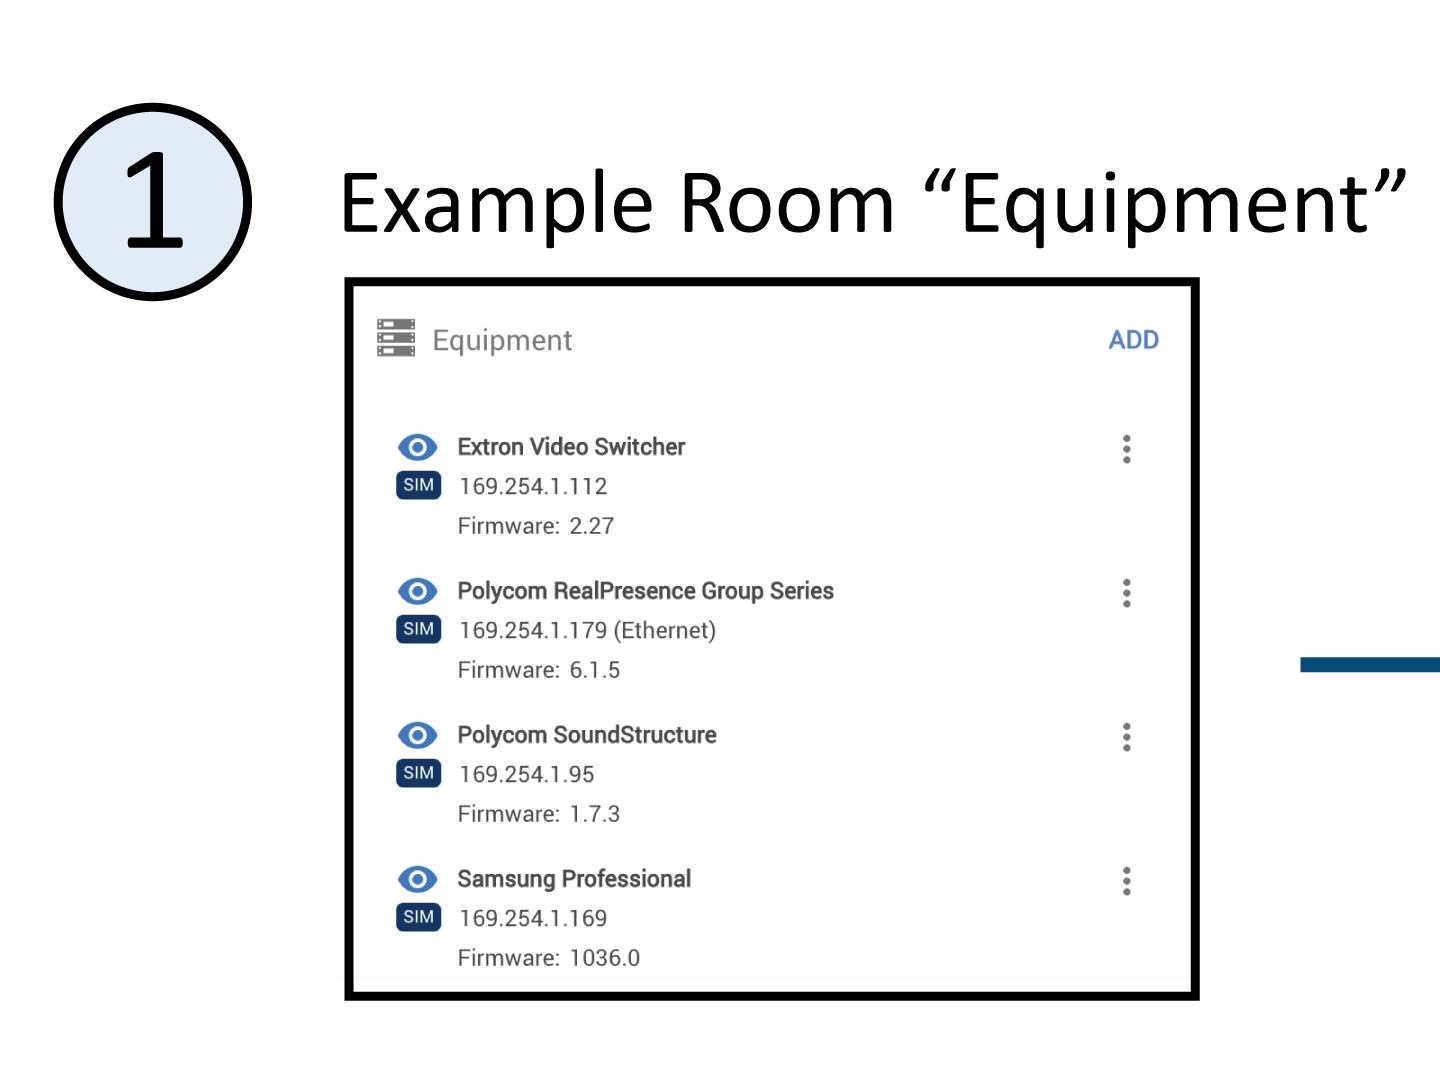
In this example there is a SoundStructure DSP device in the room. Since there is a telephony interface as part of the DSP system (see highlight 2), dialing options and “recent calls” menu entries become visible.

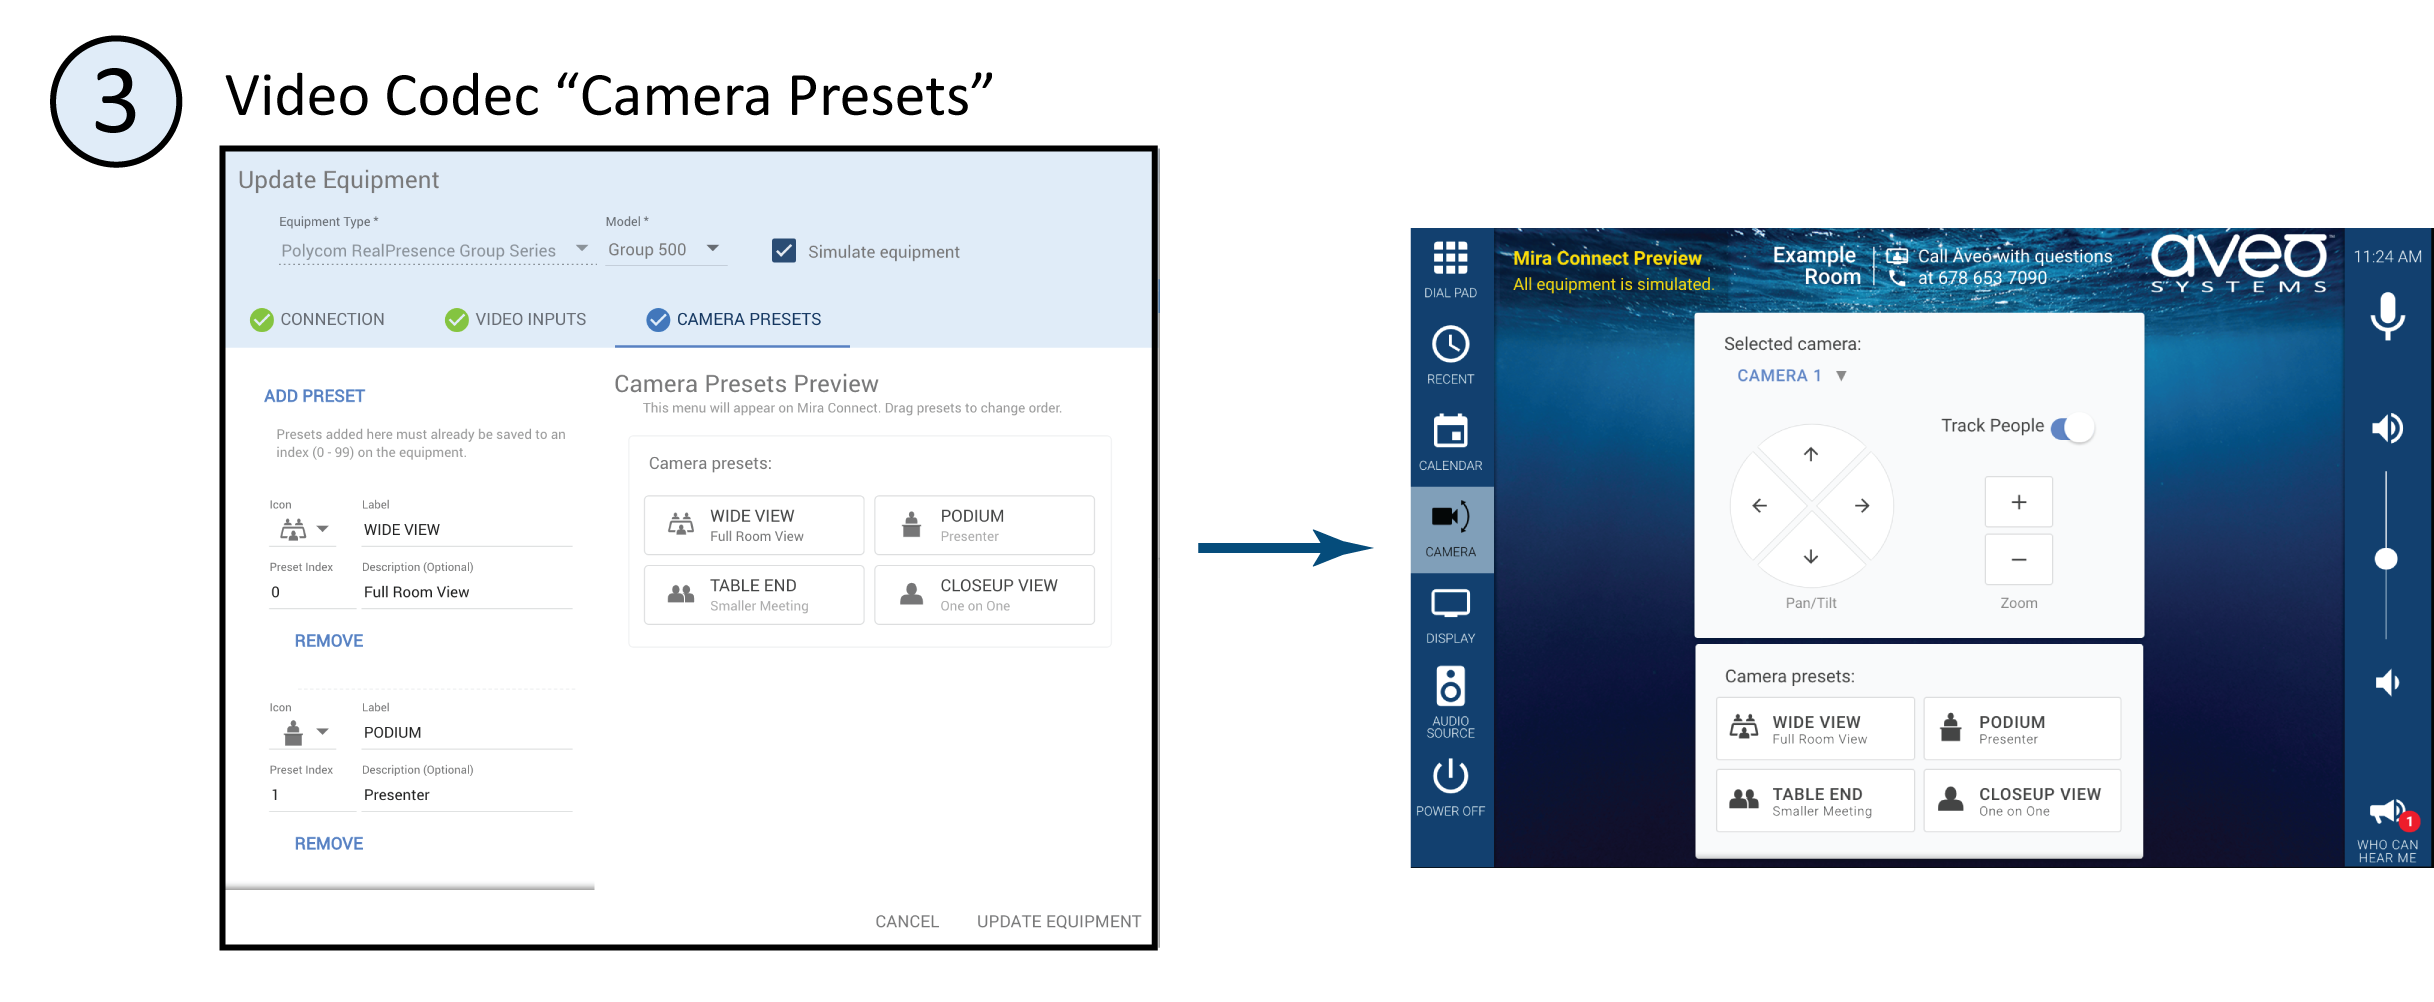
If there is video conferencing equipment in the system – a Polycom Group Series RealPresence codec in this example – a video dial button appears along with camera controls. Camera presets can be easily defined as shown in highlight 3.
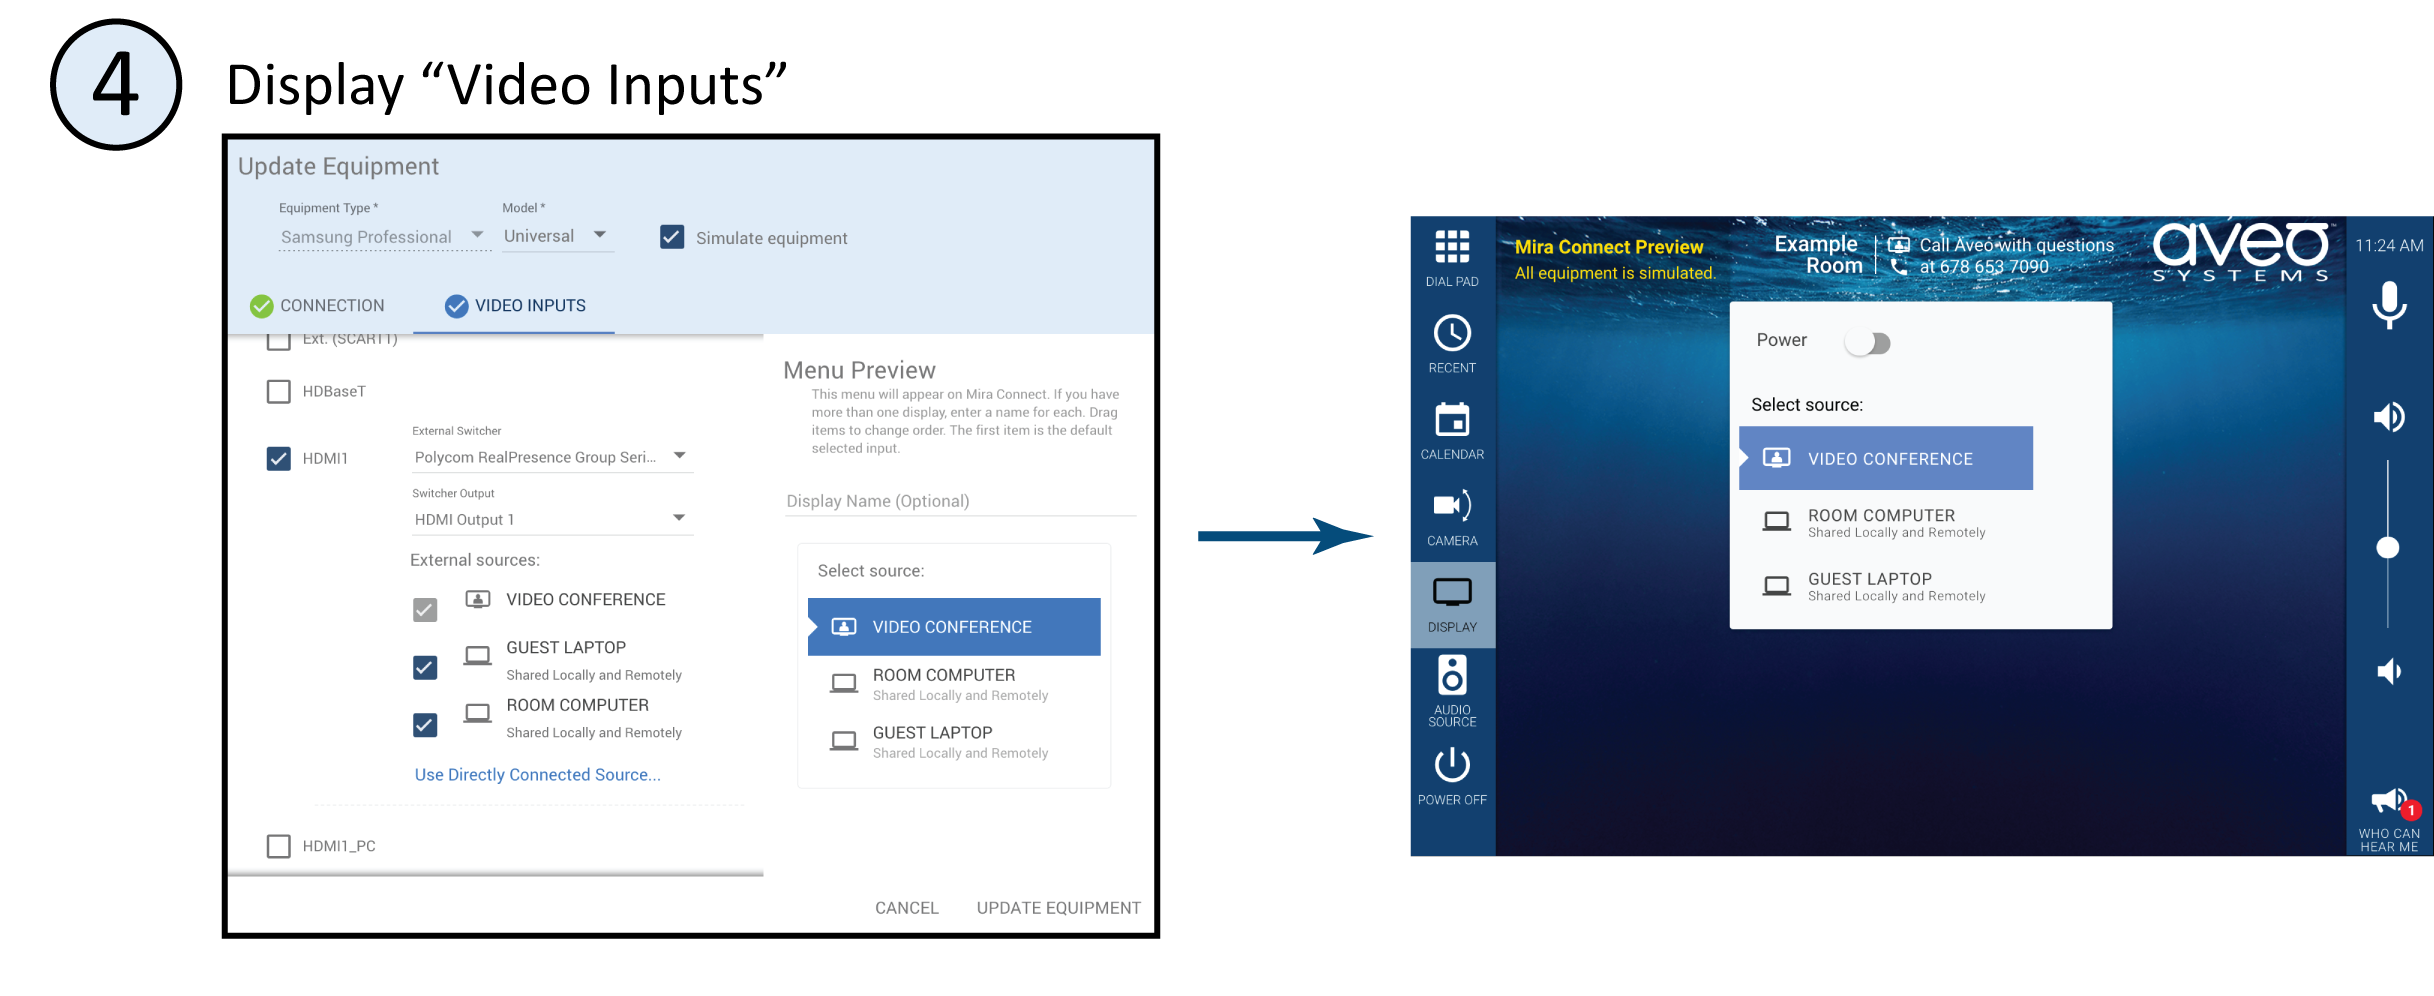
When one or more displays or projectors are added to the room, the video input settings can be configured to show the desired video conferencing and content sources, as shown in highlight 4.
Audio source selection controls can be presented by adding audio inputs to the DSP equipment settings, as shown in highlight 5. Adding a description can help users select their desired input.

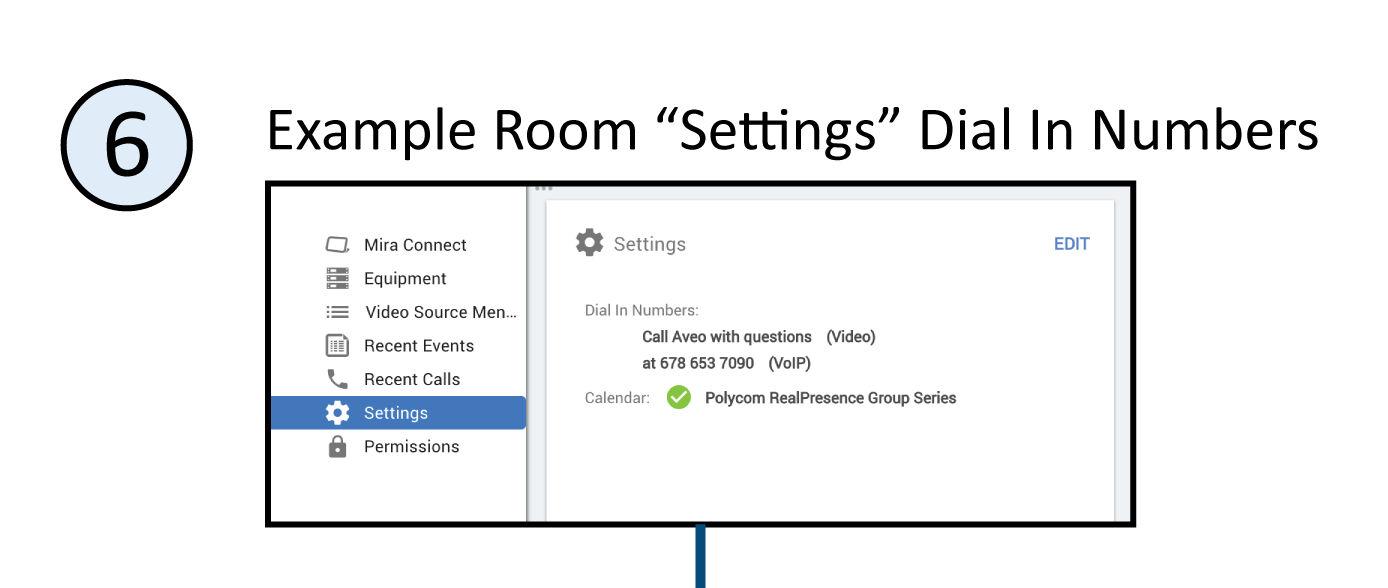
Instructions for the room user or dial-in information can be added on the top of the Mira Connect user interface by editing the room settings, as shown in highlight 6.
If a calendar is defined for the room (highlight 7), then meeting invitations for the room that include audio or video telephone numbers can be dialed by users with just one touch.

Editing the DSP equipment and selecting the mute and volume control points creates the mute button and volume slider on the right of the user interface (see highlight 8).

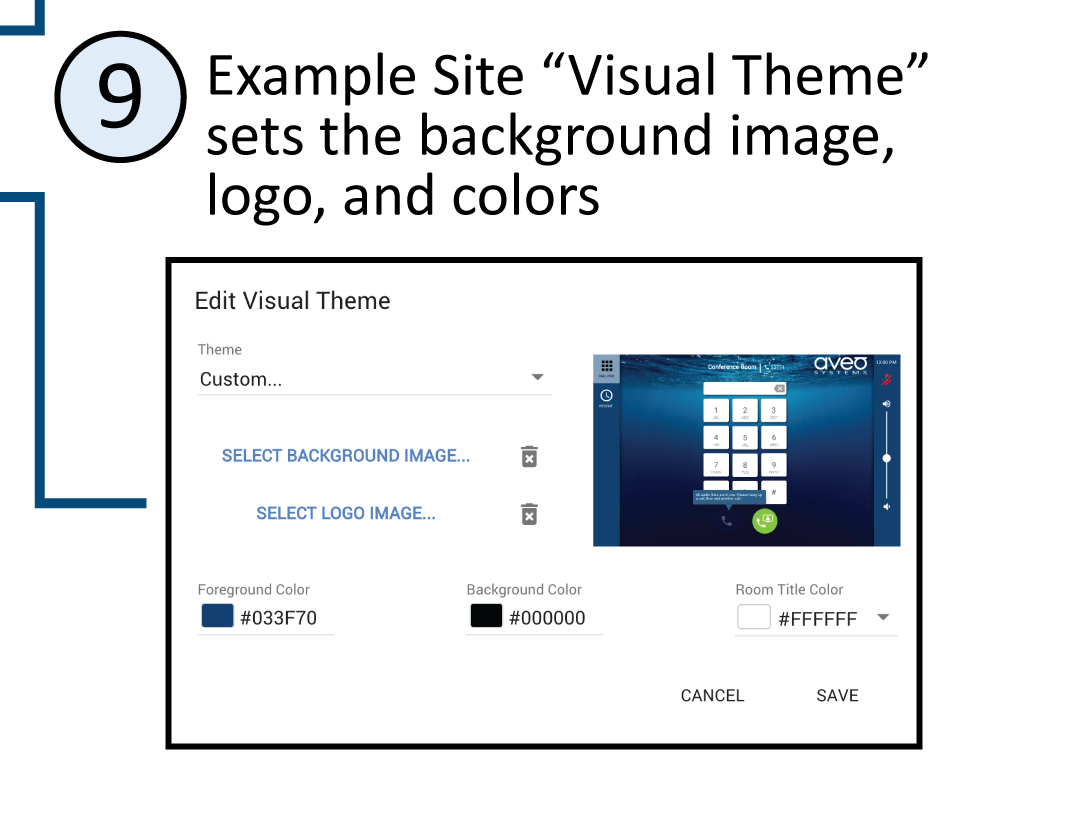
The look and feel of the Mira Connect, including background image, logo, and colors are configured on the site’s settings as shown in highlight 9. By setting the visual theme at the site level, all rooms in the site are instantly updated as changes to the visual theme are made. If you need more instructions for users, you can add them to the background image.
The interface behind the user interface is as intuitive to set up as it is to use. The behind-the-scenes wizardry makes it easy to create amazing systems, very quickly. We encourage you to explore the example organization, site, and room settings and learn more about how to create intuitive user interfaces for your applications.
For more information on creating a Mira Connect system, see the training videos. Click here for an example of getting started with the Mira Connect UI Preview feature. For reference, a Mira Connect quick start card is shown below.