 Aveo Systems has added a new tutorial in Mira Portal – the cloud-based management platform for the Mira Connect control appliance – that automatically creates an example organization, site, and room, and then adds equipment to the room. The tutorial shows the user where to click to launch the UI Preview feature to see the user interface that has been built automatically. This is the same user interface that would be running on an actual Mira Connect device that is paired to the room.
This new tutorial allows users to see what Mira Connect can do with just a few clicks after creating a new account. Users can customize and edit the equipment in the room and other settings to suit their application.
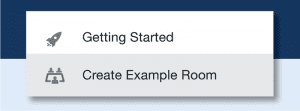
All users can select the ‘Create Example Room’ from the help menu and new Mira Portal users will automatically have the new tutorial started.
There is another tutorial, ‘Getting Started’, that walks users through creating their own organization, site, room, and adding equipment to the room.
Creating a New Mira Portal Account
 Creating a new account with Mira Portal is free and is easy to do.
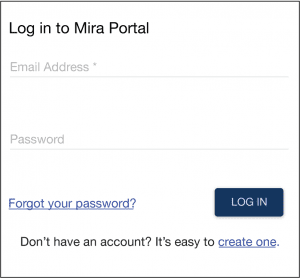
Navigate to Mira Portal and click the “create one” link on the bottom of the login window to create a new account.
After you’ve entered your user information to create the account, and reviewed and accepted the terms of service, the ‘Create Example Room’ tutorial will start. Mira Portal shows an indication of the password strength to help with setting a secure password.
Example System
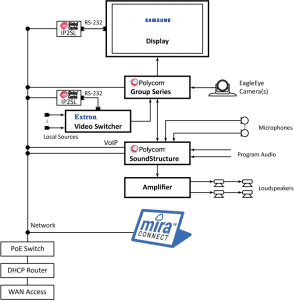 The example room, ‘Example Room’, has a Polycom SoundStructure DSP, a Polycom RealPresence Group Series video codec, an Extron video switcher, and a Samsung display as shown in the system diagram. The display and Extron switcher use Global Caché IP to serial converters to add Ethernet control to the display and switcher’s native RS-232 interfaces.
One-touch dialing is supported via calendaring from the Polycom RealPresence Group Series video codec. Office 365 calendar events could have been used instead by enabling Office 365 Calendar from the organization settings, entering the Office 365 credentials, and then selecting a calendar source from the room’s settings.
The microphone mute and volume control are controlled on the DSP, video calls are launched from the codec, content sharing is available through the codec for any of the inputs to the video switcher, and the display allows source selection and power. All of these devices are controlled by Mira Connect over their network interface. The room has a ‘power off’ mode to make it easy to turn off the display, hang-up any active calls, reset gains back to default values, and leave the microphone in a muted state.
Feel free to edit the options for any of the equipment or delete and add other equipment. This example can be recreated by simply clicking the ‘Create Example Room’ tutorial again.
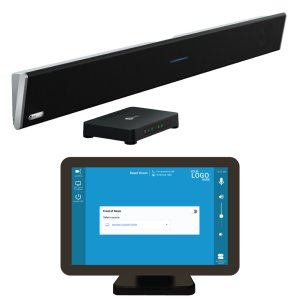
The resulting user interface is shown below. The background image and logo have been customized using the site’s Visual Theme settings.
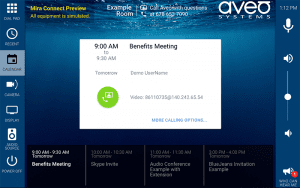
For more information about how to configure Mira Connect, see our training videos.