 Aveo Systems’ Mira Connect touchscreen control system now supports the Vivitek D3000 and D4000 series of projectors, making it easy to manage input sources of your projector using an Ethernet or RS-232 connection.
Mira Connect is easy to set up, and no costly custom programming is required. Control your Vivitek projector as well as the other A/V equipment in your conference room.
Getting Started
To get started using your Vivitek projector, create an account in Mira Portal, our cloud-based management platform, and add an organization, site, and room. Then add a Vivitek projector from the equipment list. Choose the D3000 or D4000 series models depending on the model you have.
While not every Vivitek projector will have every input supported by the different drivers, select the inputs that will be used on your specific Vivitek projector.
Next, enter the IP address of the projector, enable the desired video inputs, choose an icon, and enter user-friendly labels and descriptions for the inputs.
If controlling the projector over RS-232 (for example, by sending RS-232 control through an HDBaseT connection), enter the IP address of the Global Cache IP2SL IP to serial interface. Otherwise enter the IP address of the projector.
We recommend setting static IP addresses so the IP address doesn’t change over time.

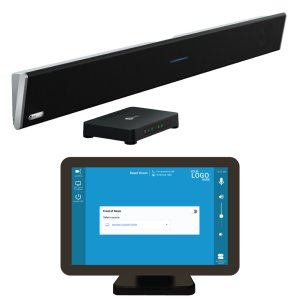
Pair a Mira Connect to the Mira Portal room to control the room. Or, if you don’t have a Mira Connect yet, use the UI Preview feature to experience the user interface in your browser.
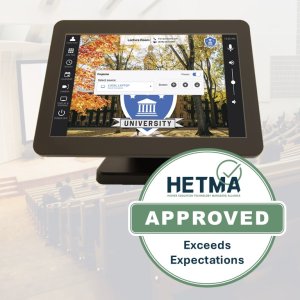
On Mira Connect, the display menus are created from the Mira Portal entries. These display menus allow users to select from the video inputs that were enabled. This makes it easy for users to select the desired video source, whether that source is connected directly to the projector or through a video switcher that feeds the projector. Users get the source they want from one intuitive menu.

Video Blank and Freeze Features
Mira Connect also supports video blank and freeze features. Video blank sets the displayed image to black while leaving the projector powered on. Freeze holds the last image on the screen. This allows a user to change sources or laptops without a transition displayed on the screen. Simply tap the enable buttons to turn those features on or to turn off.
For more details about integrating Vivitek projectors with Mira Connect using Mira Portal to build the system as you need, see Aveo Systems’ Vivitek Projector integration guide.
It’s now easier than ever to integrate and control Vivitek projectors used with video conferencing systems, video switchers, and more with Mira Connect. And with Mira Connect’s remote control capability, Vivitek projectors can be controlled from anywhere through Mira Portal.
To learn more about using Mira Connect, see our training videos.
With our UI Preview capabilities, you can get started today.